Basic file setup
Create a new Flutter project or open an existing one. We will add examples of each button in the main.dart file.
import 'package:flutter/material.dart';

void main() {
  runApp(const MainApp());
}

class MainApp extends StatelessWidget {
  const MainApp({super.key});

  @override
  Widget build(BuildContext context) {
    return MaterialApp(
      home: Scaffold(
        body:  Center(
          child: //add code here
        )
        ),
      );
  }
}
Navigator
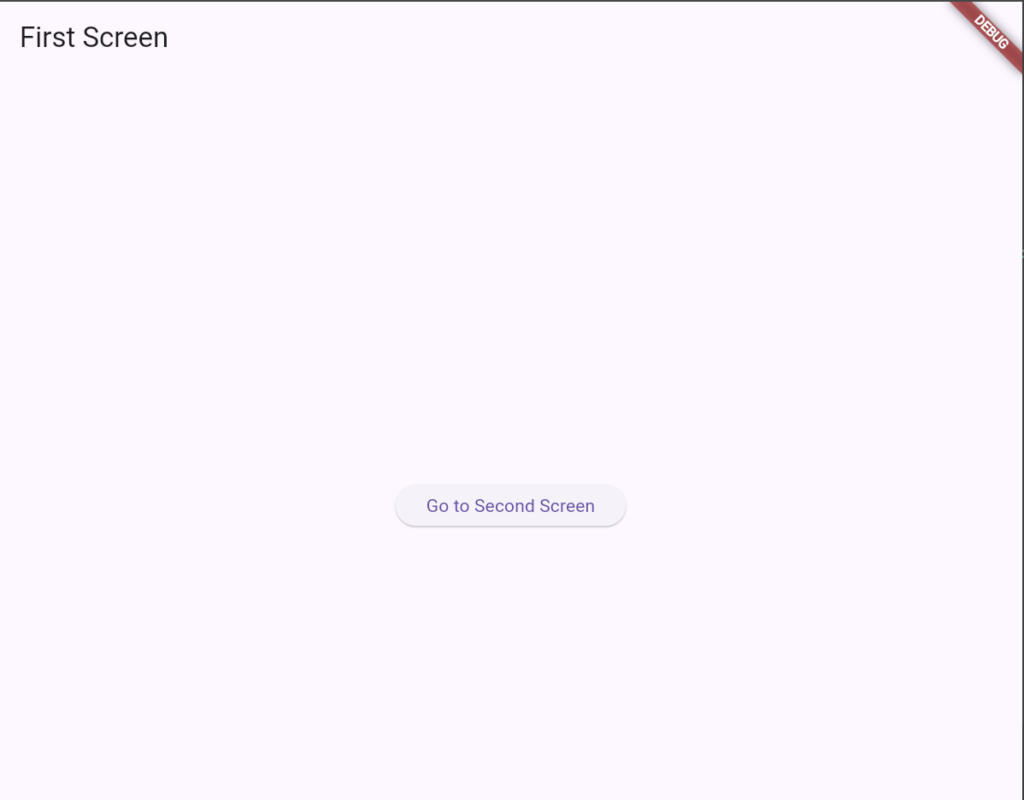
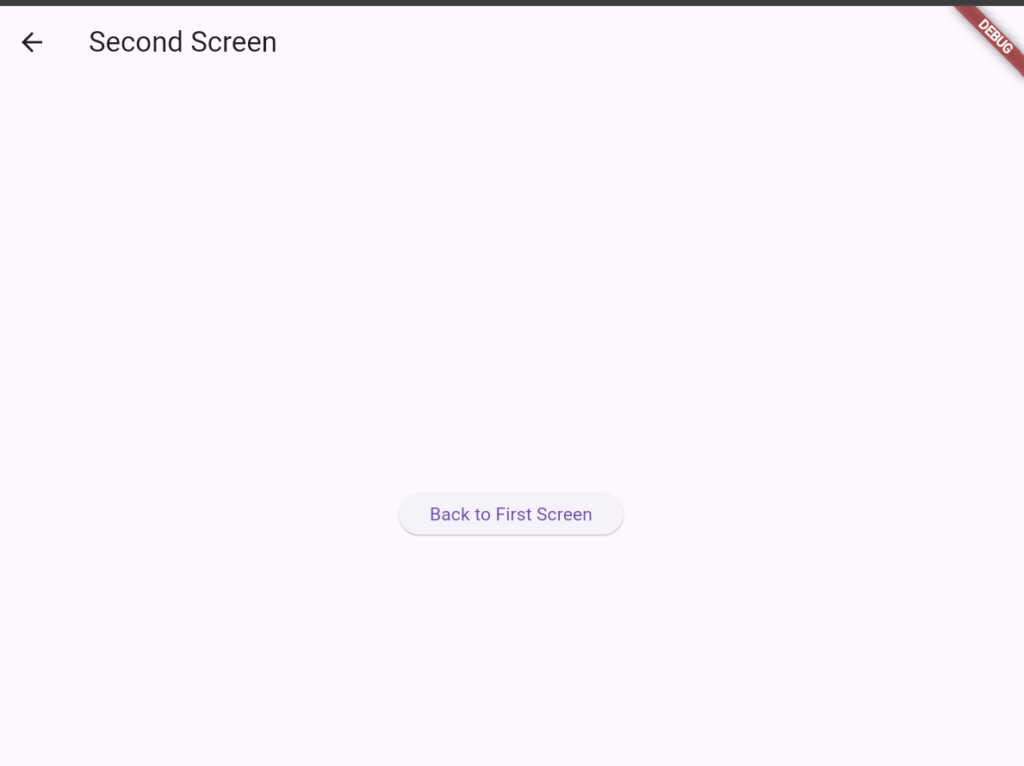
The Navigator widget is used to manage a stack of routes (screens).


FirstScreen.dart file
import 'package:flutter/material.dart';
import 'package:basic_widgets/SecondScreen.dart';

class FirstScreen extends StatelessWidget {
  @override
  Widget build(BuildContext context) {
    return Scaffold(
      appBar: AppBar(title: Text("First Screen")),
      body: Center(
        child: ElevatedButton(
          onPressed: () {
            Navigator.push(
              context,
              MaterialPageRoute(builder: (context) => SecondScreen()),
            );
          },
          child: Text("Go to Second Screen"),
        ),
      ),
    );
  }
}
SecondScreen.dart file
import 'package:flutter/material.dart';

class SecondScreen extends StatelessWidget {
  @override
  Widget build(BuildContext context) {
    return Scaffold(
      appBar: AppBar(title: Text("Second Screen")),
      body: Center(
        child: ElevatedButton(
          onPressed: () {
            Navigator.pop(context);
          },
          child: Text("Back to First Screen"),
        ),
      ),
    );
  }
}
main.dart file
import 'package:basic_widgets/FirstScreen.dart';
import 'package:flutter/material.dart';

void main() {
  runApp(const MainApp());
}

class MainApp extends StatelessWidget {
  const MainApp({super.key});

  @override
  Widget build(BuildContext context) {
    return MaterialApp(
      home: Scaffold(
        body:  Center(
          child: FirstScreen()//add code here
        )
        ),
      );
  }
}
Key Points:
- Use
Navigator.pushto navigate to a new screen. - Use
Navigator.popto return to the previous screen.
PageView
The PageView widget allows horizontal swiping between pages.
PageViewExample.dart file
import 'package:flutter/material.dart';

import 'dart:ui'; // Ensure this import is present for PointerDeviceKind

class PageViewExample extends StatelessWidget {

  @override

  Widget build(BuildContext context) {

    return Scaffold(

      appBar: AppBar(title: Text("PageView Example")),

      body: ScrollConfiguration(

        behavior: MyCustomScrollBehavior(),

        child: PageView(

          children: [

            Container(color: Colors.red, child: Center(child: Text("Page 1"))),

            Container(color: Colors.green, child: Center(child: Text("Page 2"))),

            Container(color: Colors.blue, child: Center(child: Text("Page 3"))),

          ],

        ),

      ),

    );

  }

}

class MyCustomScrollBehavior extends MaterialScrollBehavior {

  @override

  Set<PointerDeviceKind> get dragDevices => {

        PointerDeviceKind.touch,

        PointerDeviceKind.mouse,

      };

}
main.dart file
import 'package:basic_widgets/PageViewExample.dart';
import 'package:flutter/material.dart';

void main() {
  runApp(const MainApp());
}

class MainApp extends StatelessWidget {
  const MainApp({super.key});

  @override
  Widget build(BuildContext context) {
    return MaterialApp(
      home: Scaffold(
        body:  Center(
          child: PageViewExample()//add code here
        )
        ),
      );
  }
}
How It Works
ScrollConfiguration:- Wrap the
PageViewwithScrollConfigurationto customize its scroll behavior.
- Wrap the
MyCustomScrollBehavior:- Extend the
MaterialScrollBehaviorclass and overridedragDevices. - Add
PointerDeviceKind.mouseto enable mouse dragging in addition to touch dragging.
- Extend the
- Usage:
- This setup allows the
PageViewto respond to both touch gestures (for mobile) and mouse dragging (for desktop/web).
- This setup allows the
Drawer
The Drawer widget provides a side navigation menu.
DrawerExample.dart
import 'package:flutter/material.dart';
class DrawerExample extends StatelessWidget {
  @override
  Widget build(BuildContext context) {
    return Scaffold(
      appBar: AppBar(title: Text("Drawer Example")),
      drawer: Drawer(
        child: ListView(
          padding: EdgeInsets.zero,
          children: [
            DrawerHeader(
              decoration: BoxDecoration(color: Colors.blue),
              child: Text("Drawer Header", style: TextStyle(color: Colors.white)),
            ),
            ListTile(
              title: Text("Item 1"),
              onTap: () {
                Navigator.pop(context);
              },
            ),
            ListTile(
              title: Text("Item 2"),
              onTap: () {
                Navigator.pop(context);
              },
            ),
          ],
        ),
      ),
      body: Center(child: Text("Swipe from left to open the drawer")),
    );
  }
}
main.dart
import 'package:basic_widgets/DrawerExample.dart';
import 'package:flutter/material.dart';

void main() {
  runApp(const MainApp());
}

class MainApp extends StatelessWidget {
  const MainApp({super.key});

  @override
  Widget build(BuildContext context) {
    return MaterialApp(
      home: Scaffold(
        body:  Center(
          child: DrawerExample()//add code here
        )
        ),
      );
  }
}
Key Points:
- Add a
Drawerto theScaffoldto enable side navigation. - Use
ListViewto list navigation items inside theDrawer.
BottomNavigator
The BottomNavigationBar widget is used for navigation at the bottom of the screen.
BottomNavigationBarExample.dart
import 'package:flutter/material.dart';

class BottomNavigationBarExample extends StatefulWidget {
  @override
  _BottomNavigationBarExampleState createState() => _BottomNavigationBarExampleState();
}

class _BottomNavigationBarExampleState extends State<BottomNavigationBarExample> {
  int _currentIndex = 0;
  final _pages = [Text("Home Page"), Text("Search Page"), Text("Profile Page")];

  @override
  Widget build(BuildContext context) {
    return Scaffold(
      appBar: AppBar(title: Text("BottomNavigationBar Example")),
      body: Center(child: _pages[_currentIndex]),
      bottomNavigationBar: BottomNavigationBar(
        currentIndex: _currentIndex,
        items: [
          BottomNavigationBarItem(icon: Icon(Icons.home), label: "Home"),
          BottomNavigationBarItem(icon: Icon(Icons.search), label: "Search"),
          BottomNavigationBarItem(icon: Icon(Icons.person), label: "Profile"),
        ],
        onTap: (index) {
          setState(() {
            _currentIndex = index;
          });
        },
      ),
    );
  }
}
main.dart
import 'package:basic_widgets/BottomNavigationBarExample.dart';
import 'package:flutter/material.dart';

void main() {
  runApp(const MainApp());
}

class MainApp extends StatelessWidget {
  const MainApp({super.key});

  @override
  Widget build(BuildContext context) {
    return MaterialApp(
      home: Scaffold(
        body:  Center(
          child: BottomNavigationBarExample()//add code here
        )
        ),
      );
  }
}
TabBar and TabBarView
The TabBar widget creates a row of tabs at the top of the screen.
The TabBarView widget displays the content of the active tab.
TabBarExample.dart
import 'package:flutter/material.dart';

class TabBarExample extends StatelessWidget {
  @override
  Widget build(BuildContext context) {
    return DefaultTabController(
      length: 3,
      child: Scaffold(
        appBar: AppBar(
          title: Text("TabBar Example"),
          bottom: TabBar(
            tabs: [
              Tab(icon: Icon(Icons.directions_car)),
              Tab(icon: Icon(Icons.directions_bike)),
              Tab(icon: Icon(Icons.directions_boat)),
            ],
          ),
        ),
        body: TabBarView(
          children: [
            Center(child: Text("Car Page")),
            Center(child: Text("Bike Page")),
            Center(child: Text("Boat Page")),
          ],
        ),
      ),
    );
  }
}
main.dart
import 'package:basic_widgets/TabBarExample.dart';
import 'package:flutter/material.dart';

void main() {
  runApp(const MainApp());
}

class MainApp extends StatelessWidget {
  const MainApp({super.key});

  @override
  Widget build(BuildContext context) {
    return MaterialApp(
      home: Scaffold(
        body:  Center(
          child: TabBarExample()//add code here
        )
        ),
      );
  }
}